nav bar

Image Map

Thursday, May 31, 2012

Nail Polish-aholic

If you know me well, then you know that I LOVE painting my nails. I love trying new designs I find online. Loving painting my nails also means having a guilty pleasure of buying nail polish. My collection has grown and I was really excited to find the perfect item to display my nail polish.

Every year MABTS has this huge garage sale, and since Will is a student there we get to go. The awesome thing about this "garage sale" is that everything is FREE. It's held at Bellevue Baptist every year for seminary students. Sometimes you can find good stuff..sometimes not. We have been twice and both times we have come home with some good finds mixed in with some junk that we thought we needed. Anyway, when I saw this one particular item last Fall, I knew it would be perfect for my nail polish. It just needed a fresh coat of paint. I took months to get around to painting it, but it looks great hanging in the guest bathroom!
BEFORE
Had to make sure everything fit!

AFTER


What do you think?! I love the way it turned out!
Total cost: $4


DIY Painted Vases

I have seen several pins on Pinterest with tutorials on transforming old glass vases into colorful new creations. I knew I wanted to try it since we are in the process of re-doing our living/dining area and I needed a dining room table centerpiece. Soooo...I went to a few thrift stores, found some great CHEAP vases, cleaned them up, and added some color to my dining room table!


I got both of these for $10. It was far above what I spent for everything else, but I knew they would look great!


HAD to have some Mason jars thrown in the mix!
I paid about $20 for all of these with the two tall ones being $5 each. All of the other vases ranged from $0.49-$1.50 in price. I already had tons of acrylic paint to choose from too.

Will and I will be painting our living room and dining room from yellow to gray soon. So once that's finished everything will match great! We recently recovered our dining room chairs to match our soon-to-be new paint color. This was my great-grandmother's dining room set and I love the way the new fabric transformed it. 


Here's how the vases turned out!


I went to Kroger and bought a cheap bouquet and added one or two stems to each vase


I think this one is my favorite


So what do you think?! Have you tried this DIY project yet? If so, share some photos with me! I'd love to see yours! You can find a tutorial on these vases here.

Thanks!


Sunday, May 27, 2012

DIY Floral Nail Art

I bought a dress a few weeks ago from Target and remembered some nail art that I had seen before on YouTube. I knew I would have to try it out for when I was going to wear the new dress! It turned out great! You can find the tutorial here. This YouTube channel has tons of cute nail designs that I use a lot!


Good luck & enjoy! Show me your designs!

DIY Lettered String Art

I recently experimented with string art in making something for my friend's little girl, Celia. It was inspired by state string art as seen on Pinterest. I figured making it with letters would be just as easy! Turns out it was simple enough...just VERY time consuming!

What you'll need:
-piece of wood- cut to the size you want
-nails
-string- I used embroidery string from the craft store
-printer to print letters or just a pencil to draw them
-hammer

Here's how you create your personalized string art:

1-Will started out by cutting me some wood to the size I wanted. I think this one ended up being 1x2.
2- I painted the entire piece pink. Once it was dried I put some Vaseline on the edges then painted it white. The Vaseline made it much easier for distressing so the pink would show through the white.
3- I printed out the exact font and size of the letters that I wanted then cut out the letters. Once I had print them all out I realized that I could use so much less ink if I had just used an outlined black letter instead of an entire black one--duh!
4- Using painter's tape, tape down the letters onto the board exactly how you want them.


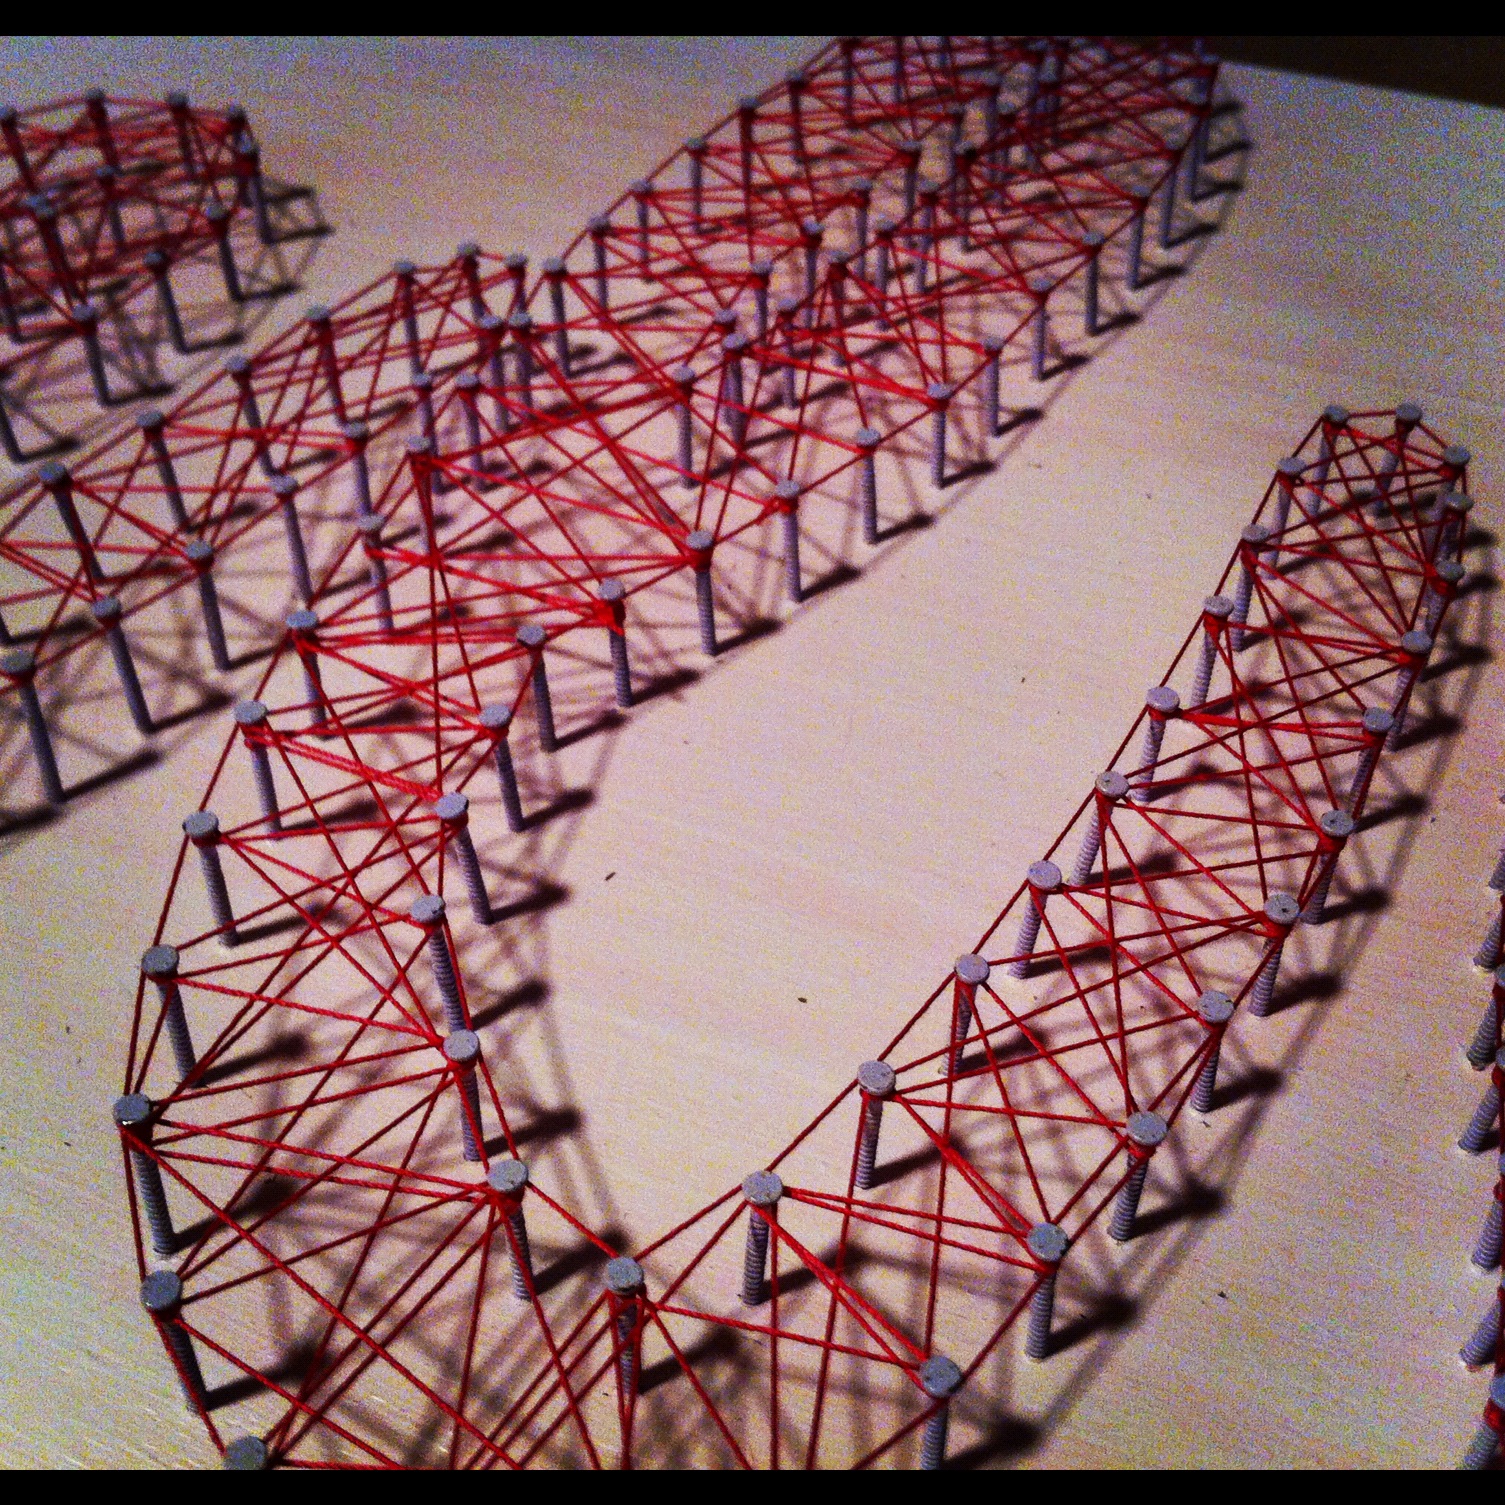
5- Next you've just got to start hammering nails around the edges of the letters. This is the time consuming part. I spaced my nails about an inch apart. I think it looks better when the nails are closer as opposed to spaced farther apart.
6- Once the nails are in place, pull up your paper letters. This is an important step! I learned the hard way and started stringing before I pulled up the letter.
 7- Tie a knot around the first nail and just start wrapping! I made about 2-3 layers of string just to make it look darker and then went around all the edges to neaten it up. 


Sorry for the low quality photos- They were taken with my phone


Good luck and enjoy! I'd love to see how you personalize your string art! It would look great used as family name deco for a living room or just made with a 3 letter monogram for a child's room!


Thursday, May 17, 2012

Puddle Jumping

It's actually more like LAKE jumping in this case. The dogs and I were bored this afternoon after getting dinner cooked and laundry done. We decided to go out to The Grove to walk around the lake. My dad is the Director of Operations out there and Will also works there part-time so I always have a good excuse to go! It is such a beautiful camp and happens to be where our wedding reception was.

We walked around the lake, the dogs swam some and I hung out with Dad & Will a little bit. The Grove is in the process of building two awesome water slides. I cannot wait to ride them!

This is the view from the tower where the two slides will come from! Much bigger than I had imagined. 
Me and Ginger & Remi were walking along the left side of the water hole is by those tall poles when Ginger got the surprise of her life. 


From her perspective she just saw these boards and I guess assumed that there would be something like a deck to walk on once she jumped up on it... Well she jumped, and then went straight down to the water. Ginger is a small dog, with stubby legs so her swimming skills aren't excellent. Once I stopped panicking and got her out of the water it was really quite funny. It just reminded me of Wile E Coyote running off a cliff where he just kind of freezes for a second....and then falls straight down.


Once I got Ginger out of the water, she started rolling around in the dirt and mud to dry off. It was disgusting! She didn't even look like herself! Ginger provided us with some comic relief today and I'm glad I snapped some quick pics of Ginger as a brunette!

She's camouflage!


My dad trying to get some of the dirt off

This picture cracks me up. Dad was driving me back to the car in his work truck. Dirty dogs have to ride in the back!


It's almost Friday! Enjoy your weekend!


LinkWithin

Related Posts Plugin for WordPress, Blogger...